这次作业需要记录的有三道题,包括:
- Bayer Interpolation\
- Projective Transformation\
- Image Filtering and Edge Detection
(1)Bayer Interpolation
作业要求:

简单来说,即是给出一张Bayer图片,将其转化为RGB图。\
作业给出的图片如下:
这里先对Bayer图进行简要说明。\
与一般RGB图不同,Bayer图的像素分布如下图所示:
在Bayer图中,每个像素点都是由单一颜色所控制,而且绿色所占的比例是其他两种颜色的两倍,所以整张图片看起来会偏绿,我们所要做的就是通过插值将每个像素点的其他两种颜色算出来。
步骤1:
将Bayer数据分成RGB通道,以便每个颜色通道仅保留Bayer模式给定的相应值,而缺失值则用零填充。
1 | def separatechannels(bayerdata): |
步骤2:
将单独的通道组合成图像。1
2
3
4
5
6
7
8
9
10
11
12
13
14def assembleimage(r, g, b):
""" Assemble separate channels into image
Args:
red, green, blue color channels as numpy array (H,W)
Returns:
Image as numpy array (H,W,3)
"""
H, W = r.shape
imgData = np.zeros((H, W, 3))
imgData[:,:,0] = r[:,:]
imgData[:,:,1] = g[:,:]
imgData[:,:,2] = b[:,:]
return imgData
结果如下图:
步骤3:
通过使用双线性插值对Bayer模式中的缺失值进行插值。\
双线性插值,简单来说就是通过邻近4个点平均出中间点的数值。\
其实主要就是计算R,G,B三通道的卷积核。说之前先解释一个函数:scipy.ndimage.filters.convolve,(python的各种库里有非常多用于卷积的函数,改天做个对比总结)。
scipy.ndimage.filters.convolve:\
(这里给个 链接,说得很详细了已经)\
scipy.ndimage.filters.convolve(input, weights, output=None,
mode=’reflect’, cval=0.0, origin=0)
    input: 待卷积的图片
    weight: 卷积核
    output:(这个未知,好像一直没用过这个,(待定))
    mode: 边缘处理,有5种(关于各个边缘模式的选用现在还未理解)

    ‘reflect’ (d c b a | a b c d | d c b a)
    ‘constant’ (k k k k | a b c d | k k k k)
    ‘nearest’ (a a a a | a b c d | d d d d)
    ‘mirror’ (d c b | a b c d | c b a)
    ‘wrap’ (a b c d | a b c d | a b c d)
cval:默认是0,当mode取constant时有效,这个的取值既是边缘外补什么值\
origin:默认0,应该是控制weight在input上的位置的,目前也还没用过
这里有一个要特别注意的是,卷积核不是直接对应相乘然后相加,而是要先翻转,举个例子,比如一个卷积核设为:
但实际上并不是上面这个与图片卷积,而是下面这个卷积核:
这点在初始化卷积核的时候要注意(不过目前遇到的好像都是中心对称的)
回到题里,G通道对应的矩阵如下图: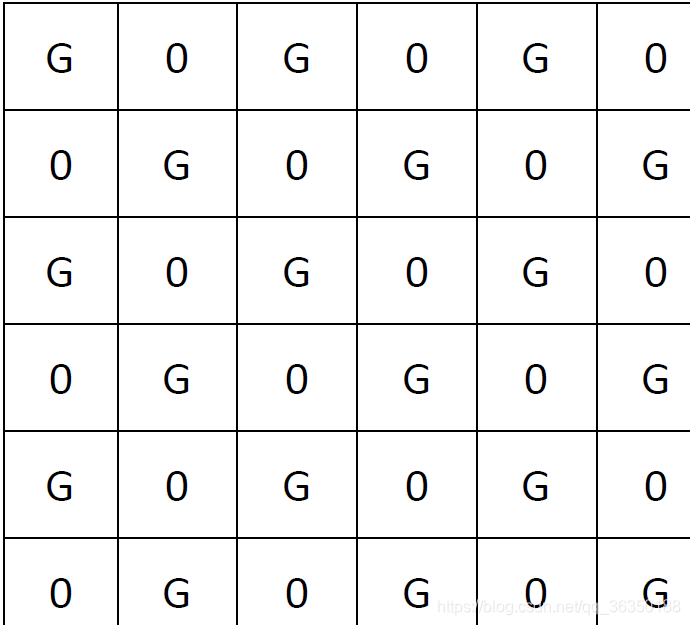
按照双线性插值,很容易能得到卷积核四个角的值,又由于应该把原本的像素值保留下来,再根据边界插值条件,就可以确定出通道G的卷积核,其他两个通道同理可各自获得卷积核值。\
代码如下:1
2
3
4
5
6
7
8
9
10
11
12
13
14
15
16
17
18
19
20
21
22
23
24
25
26
27
28def interpolate(r, g, b):
""" Interpolate missing values in the bayer pattern
by using bilinear interpolation
Args:
red, green, blue color channels as numpy array (H,W)
Returns:
Interpolated image as numpy array (H,W,3)
"""
r_weight = np.array([[0.25,0.5,0.25],[0.5,1,0.5],[0.25,0.5,0.25]])
g_weight = np.array([[0,0.25,0],[0.25,1,0.25],[0,0.25,0]])
b_weight = np.array([[0.25,0.5,0.25],[0.5,1,0.5],[0.25,0.5,0.25]])
new_r = convolve(r, r_weight, mode='mirror')
new_g = convolve(g, g_weight, mode='mirror')
new_b = convolve(b, b_weight, mode='mirror')
#print(new_g)
#print(new_r)
#print(new_b)
H, W = new_r.shape
new_img = np.zeros((H, W, 3))
new_img[:,:,0] = new_r[:,:]
new_img[:,:,1] = new_g[:,:]
new_img[:,:,2] = new_b[:,:]
return new_img
最后就是对以上函数的调用,如下:1
2
3
4
5
6
7
8
9
10
11
12
13
14
15
16
17
18def problem2():
"""Example code implementing the steps in Problem 2
Note: uses display_image() from Problem 1"""
data = loaddata("data/bayerdata.npy")
r, g, b = separatechannels(data)
img = assembleimage(r, g, b)
display_image(img)
img_interpolated = interpolate(r, g, b)
display_image(img_interpolated)
if __name__ == "__main__":
#problem1()
problem2()
#problem3()
#problem4()
最后得到的图片如下: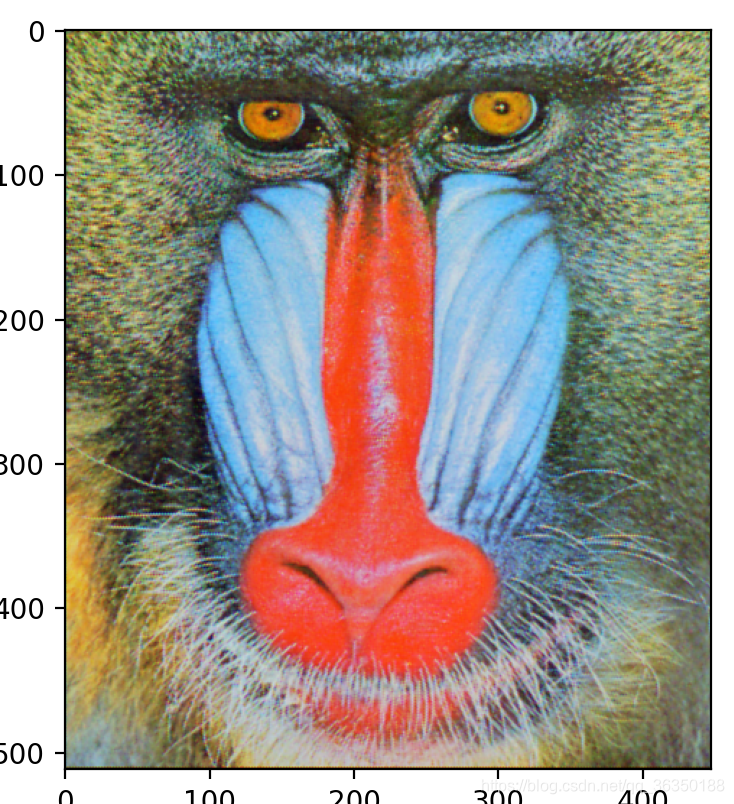
总结:
本次作业及该篇学习记录遗留下的问题:
- 卷积的mode是“mirror”,原因未明;\
- 要对python里各个库的卷积函数进行总结;\
- 这次作业用到的卷积函数的output以及origin参数